Introduction
Are you ready to create a delightful outdoor space for your little ones? A Little Tikes picnic table is the perfect addition to spark their imagination and provide a space for creativity and play. Assembling this picnic table is not only a practical task but also an exciting project for you and your children to enjoy together. In this article, I will guide you through the step-by-step process of assembling a Little Tikes picnic table, ensuring a hassle-free experience.
Why is a Little Tikes picnic table important for kids?
Before we dive into the assembly process, let’s understand why a Little Tikes picnic table is an essential addition to your outdoor setup. This sturdy and child-friendly table offers a dedicated space for your kids to engage in various activities, from enjoying snacks and meals to drawing, crafting, and even hosting tea parties with their friends. It encourages social interaction, imaginative play, and helps develop their fine motor skills.
Overview of the article’s purpose
The purpose of this article is to provide you with clear and easy-to-follow instructions on how to assemble your Little Tikes picnic table. We’ll cover everything from gathering the necessary tools to ensuring the table’s stability and safety precautions. Rest assured, by the end of this article, you’ll have a fully assembled picnic table ready for your little ones to enjoy.
Now that we understand the significance of a Little Tikes picnic table and our goal for this article, let’s delve into the step-by-step assembly process. So, grab your tools, roll up your sleeves, and let’s create a wonderful space for your children to make lasting memories.
Understanding the Little Tikes Picnic Table
Components and Features
When it comes to assembling the Little Tikes picnic table, it’s essential to have a clear understanding of its components and features. This will not only make the assembly process smoother but also help you appreciate the thoughtful design that Little Tikes has put into creating this table.
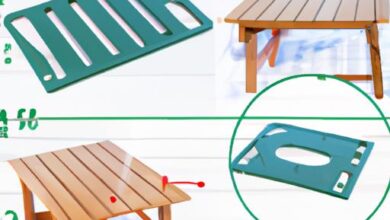
The picnic table consists of several key components, including tabletop, seats, legs, and braces. The tabletop provides a spacious surface for your little ones to enjoy their meals or engage in various activities. The seats are attached to the sides of the table, offering comfortable seating for your kids and their friends.
One of the standout features of the Little Tikes picnic table is its durability. Constructed with high-quality materials, this table is designed to withstand the rigors of outdoor use, ensuring it remains sturdy and reliable. It can handle the playful antics of your children without sacrificing its structural integrity.
Durability and Child-Friendly Design
Little Tikes understands the importance of creating a safe and child-friendly environment. The picnic table is designed with rounded edges and corners, minimizing the risk of any accidental bumps or injuries during playtime. Additionally, the table’s height is suitable for young children, allowing them to comfortably reach their food and activities without assistance.
The materials used in the construction of the Little Tikes picnic table are non-toxic, ensuring a safe experience for your kids. This table is also resistant to fading and weathering, making it a durable investment that will withstand the test of time and provide countless hours of enjoyment for your little ones.
In the next section, we will explore the tools required for assembling the Little Tikes picnic table. So, let’s move on to the next step and gather everything we need to bring this fantastic picnic table to life!
Gathering the Necessary Tools
Tools Required for Assembly
Before you embark on the exciting journey of assembling your Little Tikes picnic table, it’s crucial to gather all the necessary tools. Here is a list of tools you’ll need to ensure a smooth and efficient assembly process:
- Screwdriver: A Phillips or flathead screwdriver, depending on the type of screws provided with the table.
- Hammer: A lightweight hammer for securing any loose parts or connectors.
- Allen wrench: In some cases, the table may come with Allen screws, so having an Allen wrench handy will make the process easier.
- Safety goggles and gloves: Although not tools in the traditional sense, safety goggles and gloves are essential for protecting yourself during the assembly process.
Importance of Having All Tools Ready
Now that you have your tool kit ready, it’s important to emphasize the significance of having all the tools prepared before starting the assembly. This ensures a seamless and uninterrupted experience, allowing you to focus on following the instructions without any unnecessary interruptions.
By having the tools readily available, you can avoid delays and frustration that may arise from pausing the assembly process to search for a missing tool. Additionally, being prepared with the right tools demonstrates your commitment to safety and precision.
As the saying goes, “A well-prepared toolbox is half the job done.” So, take a moment to double-check your tool kit and ensure you have everything required. With your tools at the ready, you’re now fully equipped to dive into the assembly process of your Little Tikes picnic table.
Step-by-step assembly guide
Preparing the workspace and organizing the parts
Before embarking on the assembly process, it’s crucial to set up a suitable workspace. Find a flat and spacious area where you can lay out all the components of your Little Tikes picnic table. Take a moment to organize the parts, ensuring everything is easily accessible.
Connecting the table legs and braces
Start by attaching the table legs to the corresponding braces. Align the holes on each leg with the holes on the braces, then insert the provided screws or fasteners. Use a screwdriver or the recommended tool to secure them tightly. Repeat this step for all legs and braces.
Attaching the tabletop and seats
Once the table legs and braces are securely connected, it’s time to attach the tabletop and seats. Position the tabletop on top of the assembled legs and align the holes. Insert the screws or fasteners through the holes and tighten them carefully. Similarly, attach the seats by aligning the holes with the corresponding spots on the table legs and secure them in place.
Securing all the components with screws or fasteners
Now that the major components are in place, go through the entire picnic table and ensure all screws or fasteners are properly tightened. Double-check each connection point to guarantee stability and durability. Take your time to avoid over-tightening, as it may damage the table.
Checking for stability and ensuring all parts are tightly secured
With the assembly complete, it’s crucial to conduct a final stability check. Gently shake the table to ensure it stands firm and does not wobble. If any wobbling occurs, revisit the connections and tighten any loose screws or fasteners. Confirm that all parts are tightly secured to provide a safe and stable platform for your little ones.
Congratulations! You’ve successfully assembled your Little Tikes picnic table. It’s now ready for your kids to enjoy their outdoor adventures and create beautiful memories. Remember to periodically check the table for any loose screws or fasteners and tighten them as needed to maintain its stability and longevity.
Safety Precautions and Tips
Read the Instruction Manual Before Starting Assembly
Before diving into the assembly process, take a moment to read the instruction manual provided with your Little Tikes picnic table. The manual contains essential information regarding safety guidelines, recommended tools, and step-by-step instructions specific to your model. Familiarizing yourself with the manual ensures a smooth and successful assembly experience.
Use Safety Goggles and Gloves
Safety should always be a top priority when undertaking any DIY project. As you assemble the picnic table, it is advisable to wear safety goggles and gloves. Safety goggles protect your eyes from any potential flying debris, while gloves provide additional protection for your hands. By taking these simple precautions, you ensure a safer environment for both you and your little ones.
Avoid Over-Tightening Screws to Prevent Damage
While it’s important to ensure all the components of your Little Tikes picnic table are securely fastened, it’s equally crucial to avoid over-tightening the screws. Over-tightening can lead to damage, such as stripping the screws or cracking the plastic components. Use a moderate amount of force to tighten the screws, ensuring stability without going overboard. This will help maintain the integrity and longevity of your picnic table.
By following these safety precautions and tips, you create a secure environment for assembly, reducing the risk of accidents and damage. Remember, safety is paramount, and taking these simple measures ensures a smooth and enjoyable assembly process.
Now that we have covered the safety precautions, let’s move on to the exciting part — the step-by-step assembly guide.
Conclusion: So above is the How to Assemble Little Tikes Picnic Table: A Fun Project for Your Kids article. Hopefully with this article you can help you in life, always follow and read our good articles on the website: baseball.kiemusd.com